Step 1: Cut Squares, HSTs & QSTs
Ultimate Stashbuster
Scroll down for tool set options
Step 1: Cut Squares, HSTs & QSTs

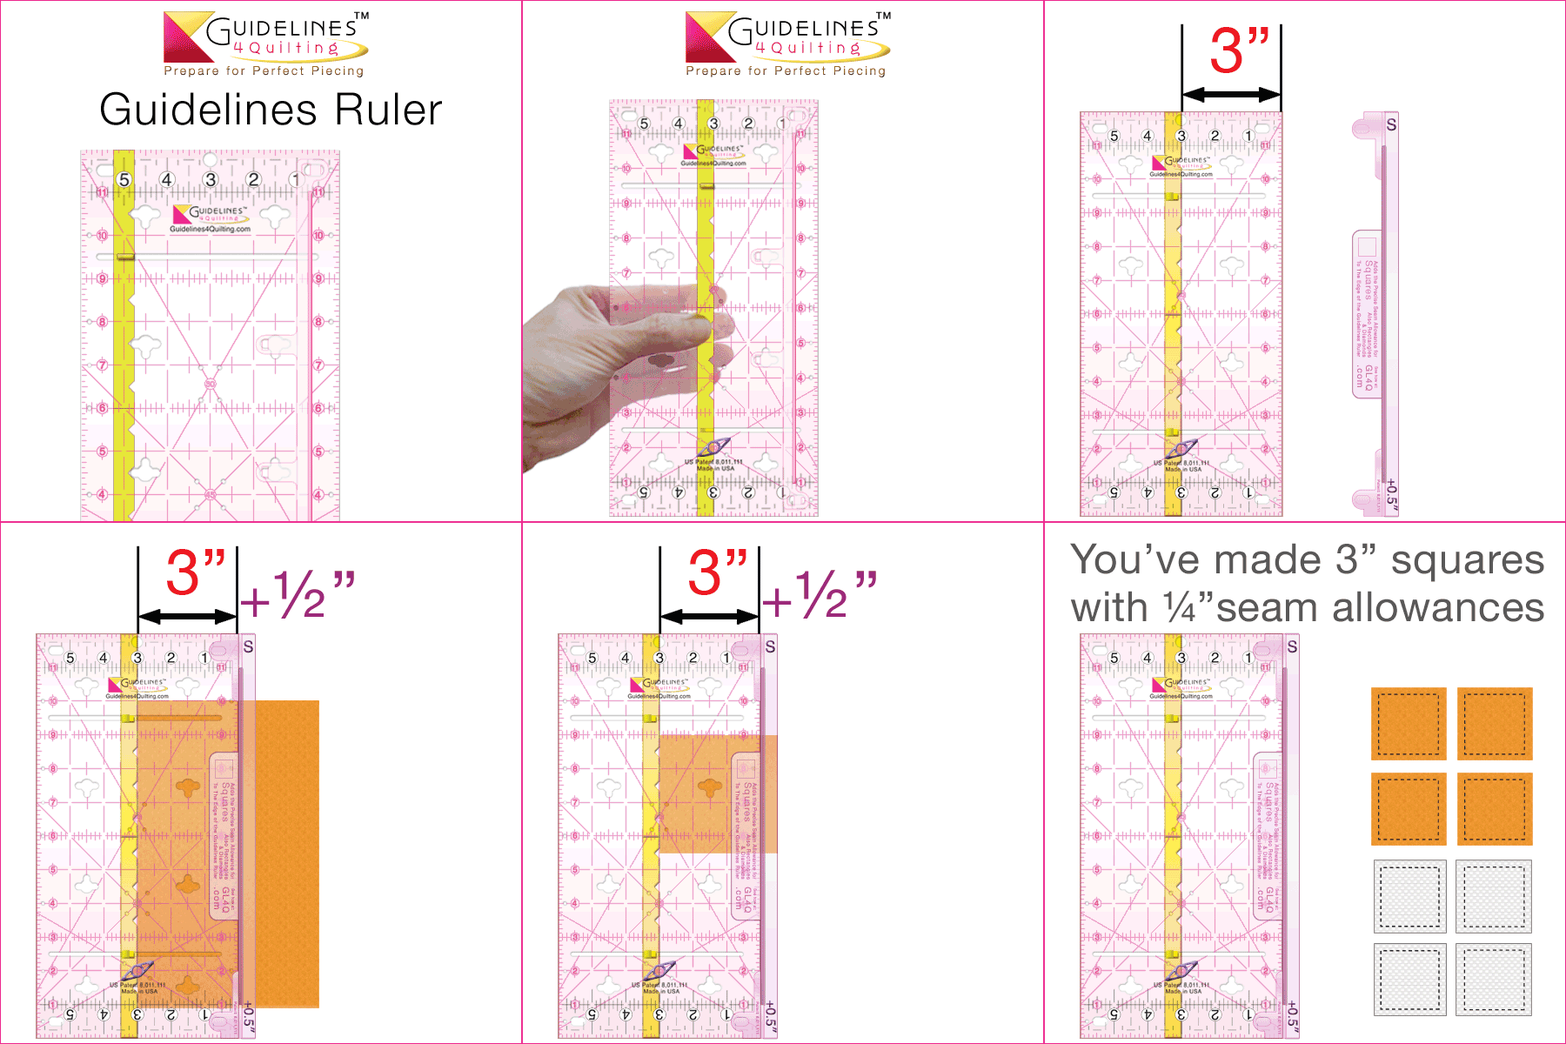
Make 3" Squares
with the purple
S Addition attached:
Make 3" HSTs
with the green
H Addition attached:
Cut the squares diagonally once to make HSTs.
Make 3" QSTs
with the red
Q Addition attached:
Cut the squares diagonally twice to make QSTs.
1/4" Seam Allowances will be automatically added to each piece.
Scroll down for tool set options
Step 1: Cut Squares, HSTs & QSTs
Step 1: Cut Squares, HSTs & QSTs
- Make 3" Squares with the purple S Addition attached:

- Make 3" HSTs with the green H Addition attached:
Cut the squares diagonally once to make HSTs and ¼" Seam Allowances will be automatically added.
- Make 3" QSTs with the red Q Addition attached:
Cut the squares diagonally twice to make QSTs and ¼" Seam Allowances will be automatically added.
The example shows the yellow Fabric Guide on the Guidelines Rulers set to the 3" line, but you can pick any other measurement for your finished patch size.
Just make sure to use the same line for squares, HSTs and QSTs.
Scroll down for Steps 2 & 3.
Tool set options:
The same tools can also be used for Finished-Size Quilting (i) to make blocks any size.
Set Options with 1, 2 or 3 Guidelines Rulers
Set Options for your 12" & 24" acrylic rulers
1/4" Seam Allowances will be automatically added to each piece.
The example shows the yellow Fabric Guide on the Guidelines Rulers set to the 3" line,
but you can pick any other measurement for your finished patch size.
Just make sure to use the same line for squares, HSTs and QSTs.
¼" Seam Allowances will be automatically added.
Scroll down further for tool set options
Step 2: Trim Triangle Points
using the Prep-Tool
Without patterns, templates or math, you’ve just made Squares, HSTs & QSTs that are the same Finished Size and will fit perfectly together.
Pre-Trimming also makes it easier to line the pieces up.
It also keeps the points from getting caught in the feed dogs of your sewing machine.
Let's Play!
Arrange the cut out pieces any way you like.
Or arrange them, using these
Quilt Block Breakdowns as a guide.
Step 2: Trim Triangle Points, Using the Prep-Tool
Without patterns, templates or math, you’ve just made Squares, HSTs & QSTs that are the same Finished Size and will fit perfectly together.
Pre-Trimming also makes it easier to line the pieces up.
It also keeps the points from getting caught in the feed dogs of your sewing machine.
Let's Play!
Arrange the cut out pieces any way you like.
Or arrange them, using these Quilt Block Breakdowns as a guide. The breakdowns are included in the 8-page booklet that comes with Seam Allowance Additions.
Color-Coded Quilt Block Breakdowns
show what traditional blocks are made of and how the pieces go together. They show all the squares in purple, half square triangles in green and quarter square triangles in red.
8-page Seam Allowance Additions booklet
includes the Quilt Block Breakdowns above:
Step 3: Sew an Accurate Scant ¼" Seam
Using the Super Easy Seam Guide Setter
Step 3: Sew an Accurate Scant ¼" Seam Using the Super Easy Seam Guide Setter
Tool Set Options
The same tools can also be used for
Finished-Size Quilting (i)
to make blocks any size.
Click here for set options with 1, 2 or 3 Guidelines Rulers.
Click here for set options that you can use with regular 12" & 24" rulers you already have.
Seam Allowance Additions are made of unbreakable Polycarbonate
and come with finger guards to protect your fingers while rotary cutting.
Every Finished-Size Quilting Set includes:
Super Easy Seam Guide Setter
Sew an accurate scant ¼" seam


